Before you start
Tables are added to your store with the Shopify theme editor, like any other block. A few minutes of preparation will make it smooth.
Requirements
- An Online Store 2.0 theme. All themes from the Shopify Theme Store released in recent years are compatible. If your theme is older, ask its developer how to upgrade.
- Shopify sections, not page builders. The app blocks can’t be used inside page builder apps. Use your theme’s sections to display tables.
- At least one table assigned to a product, with attributes and values. Otherwise there is nothing to display.
The app blocks
| Block | Type | Where to add it | Plan |
|---|---|---|---|
| Specification table | App block | Product page (or any page, with a product selected) | All |
| Comparison table | App block | Product page, landing pages | All |
| Variant comparison table | App block | Product page | Pro |
| Add to compare | App block | Product page, product cards | Pro |
| Dynamic compare | App embed | Whole store | Pro |
App blocks are added inside a section, next to your other content. The app embed is turned on once for the whole store.
Check what’s already installed
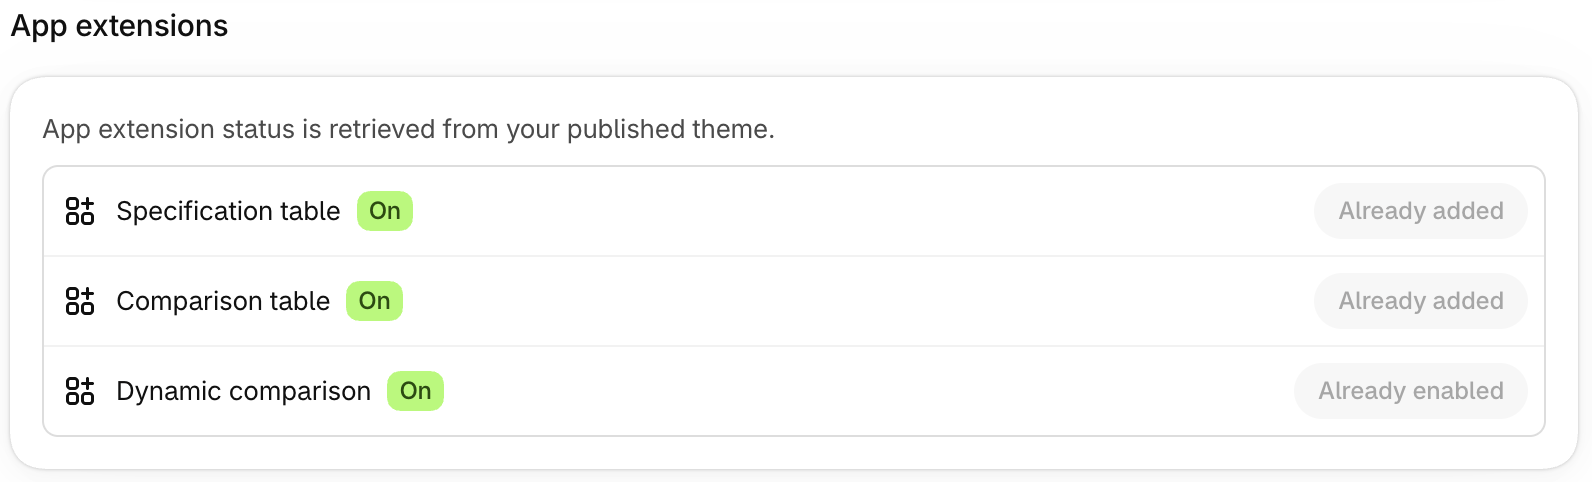
The app Home page includes an App extensions card. It shows, for your published theme, whether the specification table block, the comparison table block and the dynamic comparison app embed are On or Off.
Click Add block or Enable app embed to open the theme editor with the block already added at the right place. Then click Save in the theme editor.
Add a block manually
- In your Shopify admin, go to Online Store › Themes and click Customize.
- At the top of the editor, open the page selector and choose Products › Default product (or the product template you use).
- In the left sidebar, find the section where you want the table — usually the main product information section — and click Add block.
- Open the Apps tab and choose the block.
- Drag the block to the right position and click Save.
To display a table in its own full-width section instead, click Add section, open the Apps tab and choose the block.
Preview with a real product
The theme editor shows the product selected in its preview. Choose a product that has a table and values, so you can see the result while adjusting settings.
Messages in the theme editor
When a table can’t be displayed, the app shows a yellow message in the theme editor only — your customers never see it. It explains the reason and links to the right page of the app. For example:
- the product doesn’t have a table assigned yet,
- the table doesn’t contain any attribute,
- no products (or variants) are selected for comparison,
- the table is in Preview status, so it only appears in the theme editor.
The troubleshooting guide lists every message and how to fix it.
Settings shared by all blocks
Blocks have their own settings, described on each page, and share a few layout settings:
The product whose table is displayed. On product pages, it’s filled in automatically with the product of the page. On other pages, select a product.
Space added above and below the block.
Fill uses all the width available in the section. Custom limits the table to a maximum width (200 to 1,200 px, 800 px by default) — useful in wide sections.
The look of the tables (colors, borders, spacing…) is not configured in the theme editor but in the app’s table editor, so it stays consistent across your store.